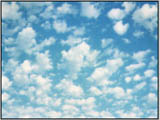
Start with a saved image...


If your background is a single color, you can select large areas of similar color with the Magic Wand tool in Photoshop.
If you need to refine your selection, hold the Shift key down to continue to increase or add to the selection, or the Option/Alt key to subtract from it with either tool.
Once you are ultimately pleased with your selection. Feather the selection (Shift-Command-D) one pixel and Delete.
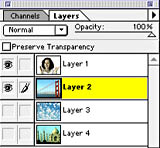
Add a layer behind and beneath

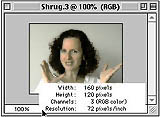
You can check the image size of both by holding down the Option/Alt key to reveal a pop-up from the Doc: box on your image's window. For the Web, a resolution of 72 pixels/inch is proper. For printing, 300 pixels/inch (dpi) will yield a better output. |
 |
Select All (Command-A) and Copy your background image. You can then Paste your copied image into another new layer 'below' your target image. (Some computers will allow you to drag your image from one window to another, creating another layer in the process.
Enjoy

Depending on the destination, save your file to the proper file format.