|
Integrating your Quote movie into your Splash webpage Once you have completed assembling it, let ImageReady slice your Splash image & create a table in a .html document so you can integrate your Quote movie. Use one of these generated slices as the background of your movie from your Powerpoint slide show. |
|||||||
| 1 | 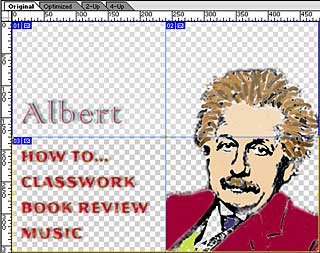 |
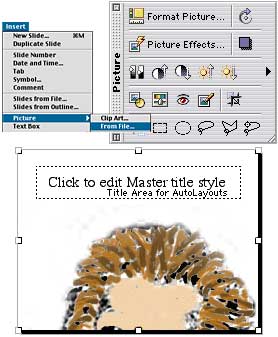
In ImageReady Open your Splash page. Reveal the Rulers (Command-R) Drag horizontal and/or
vertical guides from the Rulers (Press and drag in the rulers out
into the image) to define the edges and exact positioning and size of
your movie. With the Slice Select Tool(A), choose Create Slices from Guides from the Slices menu. If you have 2 slices contiguous or adjacent to one another, select them (holding the Shift key down) to minimize the number of slices. Choose Combine slices from the Slices menu. Do not combine your intended movie space/slice with other slices. |
|||||
|
|
|||||||
| 2 | 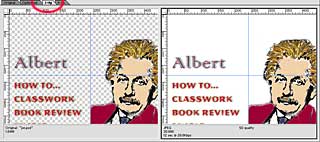 |
Select the 2up tab in the top left corner of your image window to compare your original as you Optimize your image using the Optimize palette. Adjust the Quality slider to optimize your image to no larger than 30K.
|
|||||
|
|
|||||||
| 3 |
|
You're about to generate an .html file with a table and an images folder with sliced images that fit that table solely from your Splash page. Choose Save Optimized As... from the File menu. Navigate to save these files into your folder. Name the document: index.html Check the Save HTML File and Save Images checkboxes. Choose Saving File Options... Name your image files something short and unique. Choose none from all the other popup menus, except .ext for the last one. Check the Put images in subfolder: check box and name the folder images (lowercase) Save once you have finished this sequence.
Place your finished Quote movie into the new images folder just generated from ImageReady.
|
|||||
|
|
|||||||
| 4 |
In Dreamweaver Open your freshly generated .html page in Dreamweaver. Select the corner or banner image, you plan to replace with your movie.* Choose HTML Source from the Window menu. Replace the selected text with: <embed src= "images/yourmovie.mov" type="video/quicktime" controller="false" width="240" height="180" autoplay="true" loop="true" border="1" align="top"></embed> Substitute the name of your movie and the width and height dimensions to match your .mov file. Preview it in Internet Explorer or with the slice selected, Play it in Dreamweaver. *Note the name of the slice. You can use this exact image as the background for your Quote movie. |
||||||
|
|
|||||||
|
|||||||