Prepping your materials
At this point, you have written
and refined the 3 steps of your tutorial AND found or created the images
to illustrate your edifying words.
A place for everything
Create a new folder inside your folder (inside the Techno .09 folder)
on your computer's hard drive. Name the folder with your last name and
the first two letters of your first name-- all lowercase, no spaces, no
punctuation. Example: Albert Einstein = einsteinal
This is your web folder.
It will hold the .html document and your .jpg/.gif files for your webpage.
This first page will contain
at least two of these three elements, depending on how you gathered your
images.
|
Images
Prepare your acquired images
in Photoshop.
Place all finished images
for your web page in your web folder. They must be present in this
folder before you insert/link them in Dreamweaver.
|
Text
Copy and paste your steps or type them directly into the Dreamweaver
.html document.
Spell check!
|
Links
You must also give proper credit to the original artists and create
a link to the original work on the web if you appropriate someone
else's artwork or photographs for your web page.
Gather the URLs/webpage
address along with web-found images
|
|
Dreamweaver
For the purposes of this project, I ask that you follow these design guidelines
to create similar looking pages for inclusion in the Techno.09 website.
Your own creativity will be unleashed in future pages and projects. |
|
|
Open Dreamweaver. A new Untitled
document window will open.
Choose Modify -> Page Properties,
title the page (the title of your Tutorial)
and
Save in your web folder
as [lastnamexx.html] Yes,
this is the same naming convention as your folder.
|
|
|
|
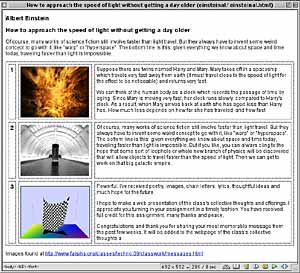
Type your name at the top
of the page, hit Return to type your intriguing title on the next
line, and select the text.
On the Properties palette,
choose Heading 3 from the Format pop-up list.
Choose Arial, Helvetica, sans-serif from the Font pop-up
list.

Hit Return again to type (or
copy and paste) your introductory and summary words on the next
line following your Title. Select this text and choose Paragraph
from the Format pop-up list and Arial, Helvetica, sans-serif from the
Font pop-up list.
|
|
|
|
On the Objects palette,
click the Insert Table icon.
Create a table with 3 rows, 3 columns, Width=100%, Border = 0 Cell padding=5,
Cell spacing=5
|
|
|
|
Place your cursor in the second
column of the table. On the Objects palette, click the Insert
Image icon and choose your .jpeg/.gif image from your web folder.
repeat for each step and its corresponding image.
|
|
|
From your text/tutorial
document, select your text and copy (Edit -> Copy)
Place your cursor in the third column of your web page document, and
Paste (Edit -> Paste)
Be sure the text
is consistant with your summary statement. (Paragraph and Arial)
Return to the
first column, place your cursor there and number your steps accordingly.
|
|
|
| Creating
a link to give credit where credit is due
If you are unable to contact
and get permission for use from the artist by email, you must still give
proper credit to the original artist and create a link to their original
work on the web if you appropriate their artwork or photographs for your
webpage.
In Dreamweaver, select the
image or your credit line text on your webpage.
On the Properties palette
in the Link field, type (or copy and paste) the address
of the webpage where you acquired someone else's images for your web page.
The address should begin with [http://www. ] in order to become a clickable
link on the webpage.
|
 |
| If
the imagery is your own creation; photographs, drawings, etc. give yourself
a credit line at the bottom of the page. |